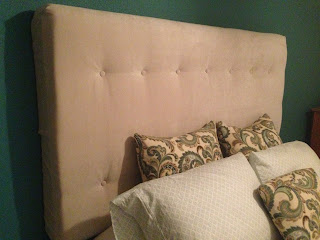
Supplies
Two 3’x3’ pallets
(based on size of bed- mine is a queen)
One thin sheet of plywood- 3’x6’
Wood screws
Drill
One 2x4
Saw
Four sets of: Wall mount brackets
(male and female interlocking parts)
Two queen mattress foam toppers
Batting
Fabric- to cover
Staple gun & staples
Buttons for tufting
Hot glue gun
Large sewing needle
Metal wire
Wire snips
Step One
Remove the vertical slats from back of pallet, so that it
will set flush on wall.
Step Two
Place the two pallets side by side facing up. Attach sheet
of plywood to top of pallets with drill and wood screws. This is what will
secure the pallets together- so use as many screws as possible.
Step Three
Measure and using saw, cut down 2x4 to cover exposed sides
of pallet
Step Four
Plan out the layout for your button placement.
Measure and drill holes accordingly.
Measure and drill holes accordingly.
Step Five
We decided we wanted a floating headboard- so to achieve that:
Attach male side of wall mount brackets to the pallet.
Measure and drill female side to wall
(Place headboard at its construction state to see if brackets line up)
Attach male side of wall mount brackets to the pallet.
Measure and drill female side to wall
(Place headboard at its construction state to see if brackets line up)
Step Six
Attach the two layers of mattress foam to all sides of
pallet- Staple to the back of pallet to secure
Add batting next- this will add for a cleaning look.
Cut foam and batting away around brackets
Add batting next- this will add for a cleaning look.
Cut foam and batting away around brackets
Step Seven
Lay out your fabric (iron if needed) on flat work surface (the floor works great)
If you are using a patterned fabric make sure material is straight
Lay pallet on top of fabric
Fold sides over to back
Pull tight and staple to secure
Cut fabric away from brackets
If you are using a patterned fabric make sure material is straight
Lay pallet on top of fabric
Fold sides over to back
Pull tight and staple to secure
Cut fabric away from brackets
Step Eight
(Tufting with buttons)
(I didn't find buttons I liked, so I bought the packages to make your own. I used the same fabric I picked to cover the pallet with.. I will say it was pretty hard work- this is where the hot glue comes into play also.)
Feed wire from back of pallet with needle
Once fed- Place button onto wire
Loop wire around onto its self to create a secure hold
From back- pull wire tight
(to create the “tufting” effect)
and staple down to
hold, snip excess wire


D4143E33C8
ReplyDeleteTakipçi Satın Al
Abone Satın Al
SEO Ajansı