{ Search The Blog }

Thursday, October 23, 2014

Thrifty Thursday: Suitcase Side Table


Earlier this month, my mother-in-law, sister-in-law and I took a trip to Round Top.
If you have heard of this place/event before- you know how amazing it truly is.
I was in pure heaven.

I came back with lots of goodies.

Vinyl Records - 5 for $10
Vintage ruler - $12
Brass candlesticks - $13
Mercury Lamp & Bowls - $25
Vintage Suitcase - $20

I had big plans for the suitcase!

Here is what I turned it into!
 
 
I purchased a DIY 24" barstool from Walmart -  $12 bucks
A can of spray paint - $6
(I wanted the color to closely match the hardware on the suitcase)


(Diaper boxes come in very handy for all my spray painting projects)
 
Once the barstool was dry, I put it together (minus the round top portion) and used a couple of pieces of Velcro to adhere the suitcase to the top of each leg.

*You could screw the suitcase to the legs also. But just incase I want to use the suitcase for something else- I opted out.
 
Viola!
Here is our new bed side table.
 
And all for under $40 Dollars!
 
Happy Hunting!


Thursday, October 16, 2014

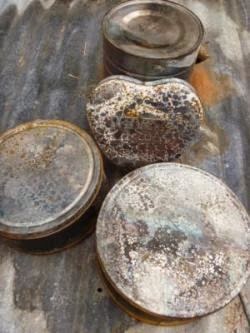
Trending Now: Tin Can Upcycle


Say Good Bye to the mason jar, and Hello to the tin can.
 
 
Start saving your cans now!
 
Here are a couple of great DIY's I have come across.


Christmas tea light holders
 
 
Tin Can Storage
 
Items needed:
Can, paint, lace, ribbon


Kitchen or office can storage
 
Items Needed:
Can, vintage labels printer- found on computer, add wire and hang on rack.
 
 
Just add fire!
 

Happy Crafting!


Images Via:
Pinterest.com


Monday, October 13, 2014

A Halloween Affair


We celebrated our son's first birthday with a Halloween themed costume party.
 
Brayden Cash as Ace Ventura
 

Corey and I as Wayne & Garth from Wayne's World


Our Family!


Here is a {free printable} for the Bats,
I cut them out on cardstock and slightly folded each one in half- to create the illusion that they were flying. 
 
  
Candy Bar
 
 
Poison Apples- Carmel Apple
Eye of Newt- Green Grapes
Crows Bones- White Chocolate Pretzel
Witches Warts- Chocolate Chips
Spider Legs- Black Licorice
Pumpkin Teeth- Candy Corn
Monster Scabs- Wheat Thins
Witches Fingernails- Bugles
Zombie Teeth- Yogurt Covered Granola
Night Crawlers- Gummy Worms with Crumbled Oreos
Hallowed Frog Eyes- Sour Gummy Lifesavers
Ghost Poop- Marshmallows

(I bought different size drinking glasses from the dollar store and filled them with the goodies.
 You could also use different size vases, but I wanted something that I could resuse.)
 
{Free Printable}

Dragon Blood Punch
(adult punch)
 
Apple Juice - 46 ounce
Cranberry Juice- 48 ounce
Ginger Ale - 2 Liters
Berry Vodka - 1 bottle
Red Hawaiian Punch - 46 ounce

(I added a frozen ice hand in also, by filling up a rubber glove then removed the glove once frozen.)
 
 
Swap Juice
(Children's Punch)
 
Limeade- Frozen- 12 ounce
Lime Sherbet- 1 quart
Sprite- 2 Liters
(With ice hand)
 
 
Special Brews and Poisons
 
 
We filled mason jars with fake ears, fingers, a heart and a brain.
There was also a hand- chilled on ice.
The rest of the bottles I spray painted and labeled with different spooky, creepy ingredients.


I covered the canvas we have hanging in our dining room with black fabric and painted
"Happy Birthday Brayden"- with white fabric paint.
 
 
Floating Witches Hats & a Broom- hung with fishing line.
 
 
Bloody Towels 
 

We turned out bathroom into a creepy crime scene. 
 
((This part was for adults only- a little too scary for the kiddos.))
 
We got a mans head from the spirit Halloween store. This head inspired the whole creepy bathroom idea. My husband built a body out of a men's dress shirt and a pair a jeans. 
 
 
He stuff the clothes with newspaper and added some wire to the legs and arms so that he could bend the man in place, and to help make it look a little more realistic. 
 
 
  We got the fake blood from the spirit store also! 
((It washed off our bathtub with just soap and water.)) 

Spooky Candles


I bought white pillar candles and a black and red candle stick. 
How-to
Light the candlestick and drip the wax down the pillar candles.  
 
 
We made a Time Capsule for Brayden


We also had a jar filled with Candy Corns- for kids to guess how many were inside, for a prize.

 
{Free printable}
 
Most of the décor was made and installed by me, my husband and my mom.
We may or may not have went a little over board.. haha. But it turned out great, defiantly will go down in the books as one to remember.
However, I am not so sure how we are going to top this party in the years to come?!
 
Happy Birthday to our handsome baby boy!
&
Happy Halloween to you all!


Thursday, October 9, 2014

Follow my blog with Bloglovin

 
Come follow me on Blog Lovin'


Ashley Barrett Designs

 
I have recently retired the "Behind The Design" blog name- for "Ashley Barrett Designs"
To hopefully better sever has an umbrella.

Same blog, same me- just a new name.
I hope my previous readers are still able to locate the blog and still enjoy enough to follow along.
 
Please stay turned for updates and changes.