{ Search The Blog }

Wednesday, December 21, 2016

Before & After: Bathroom Remodel

It has been a very busy couple of months over here!

We just finished this master bathroom remodel.
 
Before Pictures


This home was built in the late 1950s.
It originally did not have a shower in the master bathroom.
It was added years later. But not done to code- if you know what I mean..


Before Floor Plan

My Purposed Plan  

 There was a lot of plumbing involved in this project.


 We needed to tie the new shower plumbing into the rest of the house.
(It was on it's own french drain-- so weird)

We had to jack hammer a good amount of the floor to do so. 
And then fill the holes with new cement.

Once the plumbing and framing work was complete- we were able to move forward!

After the sheetrock work was complete, we installed ship lap that was salvaged from the clients parents home- on the back wall.
Painted and started tile work.

Paint Colors:
Walls: Saxon Grey #HGSW1455
Trim, Doors & Ceiling: Dover White #6385
Ship Lap: Incredible White #7028
(All from Sherwin Williams)


I just can not get enough of this bathroom!!
It has vintage charm with a modern appeal.

I am so happy to have been apart of another project for this family.
Looking forward to their next one!


Tuesday, December 20, 2016

Before & After: Kitchen Remodel

We just completed another kitchen remodel.
I started meeting with this client last year.
We finally started construction this past October.

Here are a few before pictures of the space.


This project all started because the client wanted to remove the existing microwave, and replace it with an up draft vent hood. 

The rest stemmed from there.
 After all- if we are doing the work, might as well have it done like you've always dreamed of.
 
(You will notice in this picture- the corner section was remade)
 
We wired for under cabinet lights- to be on a dimmer of course.

 
This cabinet was taking out of the corner and reused over here for a soon to be- coffee bar.

We painted the cabinets- inside and out.
Revere Pewter 
from Benjamin Moore 

 
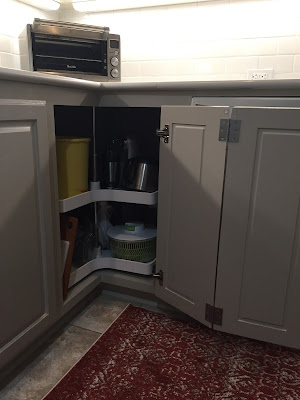
Behind each base cabinet door- we made custom pull out trays.

 
A lazy susan was added to the corner.
To maximize usage. 

 The star of the room! 
 The new vent hood cabinet- the most important part of this whole kitchen design. 
It took a while to finally get to the desired look, but once we got there- it was just how we pictured it!

  
We installed 3cm quartz countertops
 and white 3x6 subway tile for the backsplash


Another addition, was this custom size island cart made from red oak wood, with a clear coat of lacquer finish. And cherry on top- a walnut butcher block top!
We found this Towel Hook Rack from Target to complete the look.


Here are some close ups of the details throughout the space:


 Hinged drawer face in front of the sink- for sponge storage.
  
Pull out tray under the sink.

The Coffee bar


The complete look


This project really tested my patience at some points.
But with all projects- there are ups and downs.
And in the end it turned out just how the client and I hoped it would. 


Thursday, December 15, 2016

Obsessed With: Plaid, Wreaths & Succulents


I have a few items that I am currently obsessed with, I thought I would share them with you!

 'Tis the season for Buffalo Plaid!


I am seeing this bold print everywhere these day.
I love it!


 Up next:
This beaut!

 And who doesn't love how gorgeous succulents are!


Copper Planter Pots 

We have a few succulents of our own- so fun watching them grow.
And so easy to care for.


I hope everyone is enjoying the holidays, we sure are getting excited!


Friday, October 28, 2016

Before & After: Cabin Remodel


A few weeks ago (9 to be exact!) I started another remodel.

The first part of the project- was to update this small bathroom.


(Before picture on the left, After on the right)


We converted the bath tub into a shower. We remade the vanity cabinet, installed granite and updated all the fixtures.


Here are a few close up pictures, so show the detail in the tile work.


The second part of this project, was to tackle this small bedroom/office.


(Before picture on the left, after on the right)


We removed the existing ceiling tiles.
We replace the carpet with vinyl plank (to match the bathroom and hallway).
Gave the room a fresh coat of paint.


We enlarged the closet, added a sliding barn door.
And to help make the room feel a bit larger, we added a large dressing mirror.


It is always a great pleasure to have my clients wishes and my vision come to life!


In the mean time, I have started another complete master bathroom remodel, a kitchen remodel starts
on Monday & another master shower remodel on Wednesday!


Whew! Busy busy!